


How to Sign Your Commits: A Guide for Git Users
Boost Your Code Security, Learn How to Sign Your Commits Like a Pro


Why Sign Your Commits?
Before learning how to sign commits, we will learn why signing your commits is important.
Commit signing offers several benefits for both individual developers and collaborative projects:
Code Integrity: Signing your commits verifies that they were indeed authored by you and have not been tampered with since. This helps maintain the integrity of the codebase and ensures that only trusted changes are accepted.
Attribution: Signed commits provide clear attribution, allowing project maintainers and collaborators to identify the author of each change accurately.
Trust and Verification: By signing your commits with a cryptographic key, you establish trust in your contributions. Other developers can verify the authenticity of your commits using your public key, thereby increasing confidence in the codebase.
Compliance and Audit Trails: In certain industries or projects with strict regulatory requirements, commit signing helps maintain compliance and provides an audit trail for all changes made to the codebase.
How to Sign Your Commits
Signing your commits involves a few simple steps. Below, we outline the process using Git and GPG (GNU Privacy Guard), a widely-used open-source encryption software:
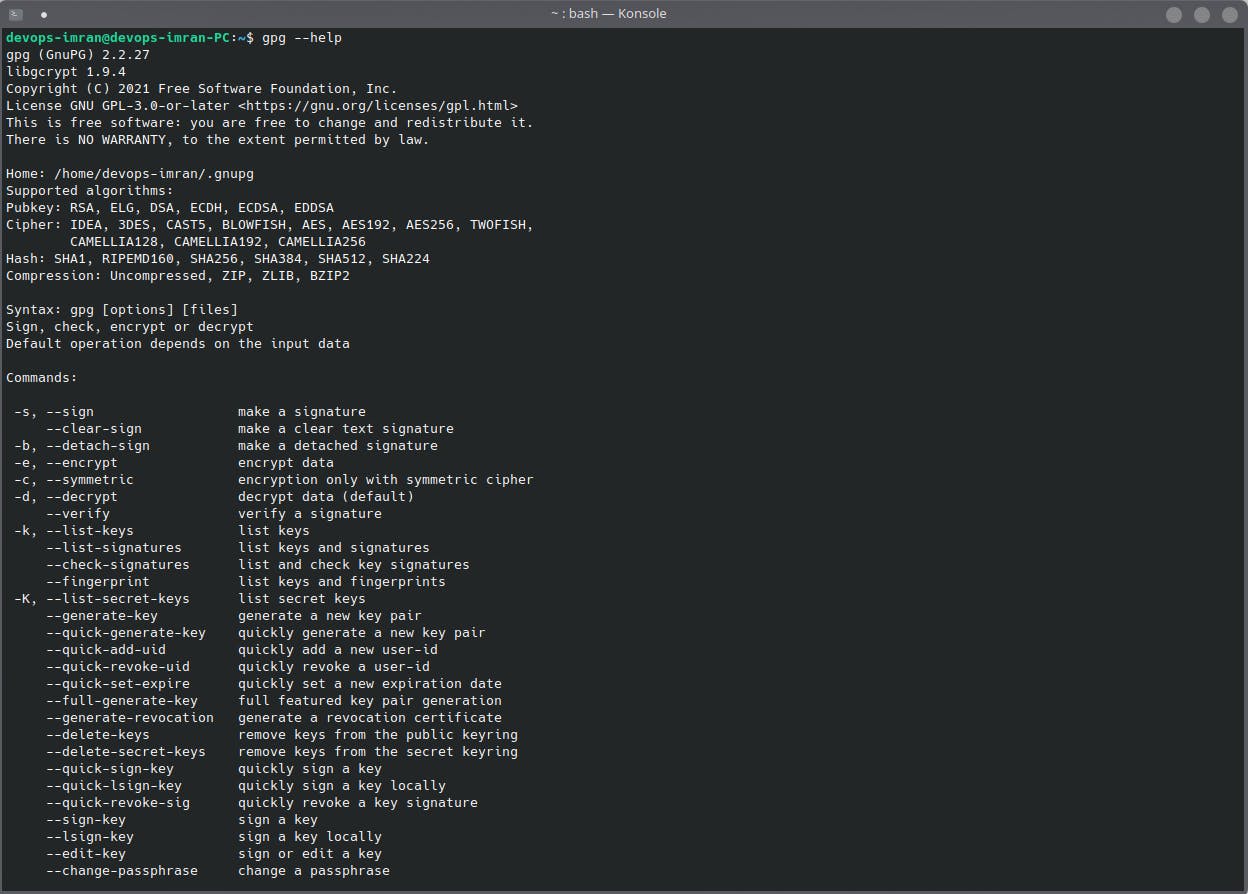
Step 1: Install GPG
If you haven't already, install GPG on your system. You can download and install GPG from the official website for Windows and MacOS or use your package manager for Linux distributions.
I am using Ubuntu. GPG is already installed on that. Check it by using the gpg --help command.
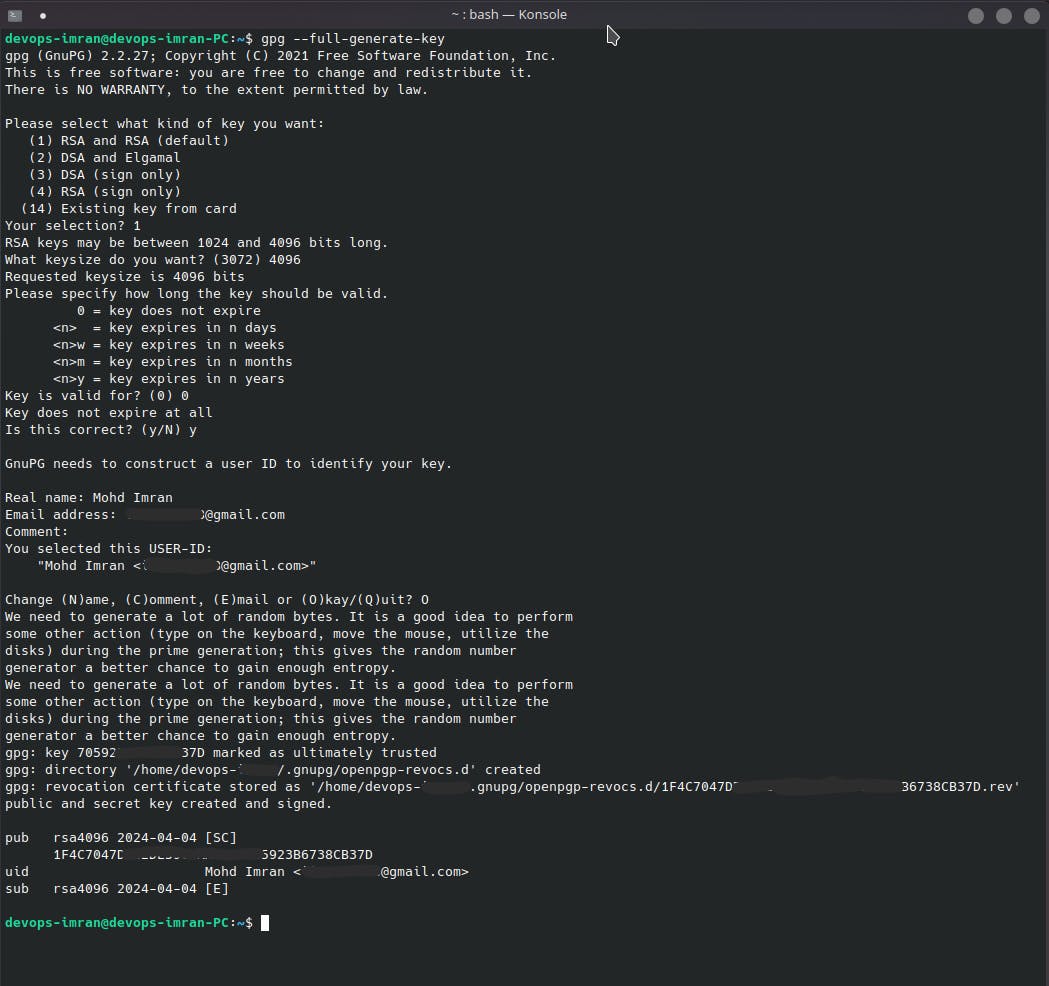
Step 2: Generate a GPG Key Pair
Generate a new GPG key pair using the gpg --full-generate-key command. Follow the prompts to enter your type of key, key bit size, expiration time, name, email address, and passphrase. This passphrase will be used to protect your private key, so choose a strong and memorable one.
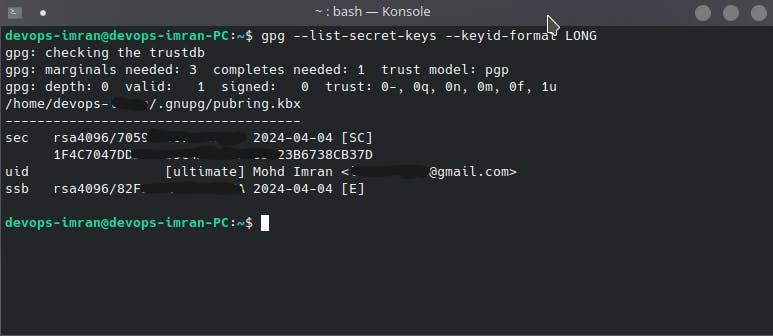
Step 3: List Your GPG Keys
List the GPG keys on your system using gpg --list-secret-keys --keyid-format LONG. This command will display a list of GPG keys along with their associated IDs.
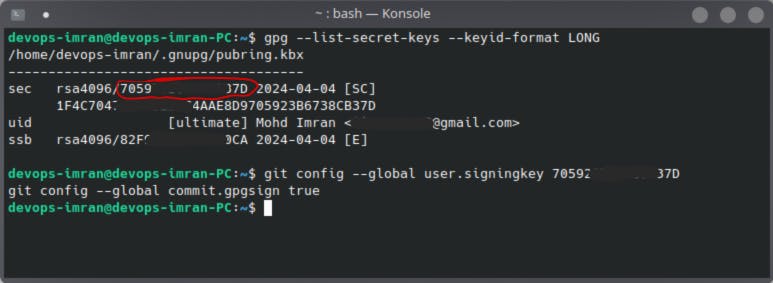
Step 4: Configure Git to Use Your GPG Key
Configure Git to use your GPG key for signing commits by running the following commands:
git config --global user.signingkey <GPG_KEY_ID>
git config --global commit.gpgsign true
Replace <GPG_KEY_ID> with the ID of your GPG key, which you obtained from the previous step.
Step 5: Make a Signed Commit
Now, whenever you make a commit, add the -S flag to sign it with your GPG key:
git commit -S -m "Your commit message"
Your commit is now signed with your GPG key, and the signature is embedded in the commit metadata.

Step 6: Share Your Public Key
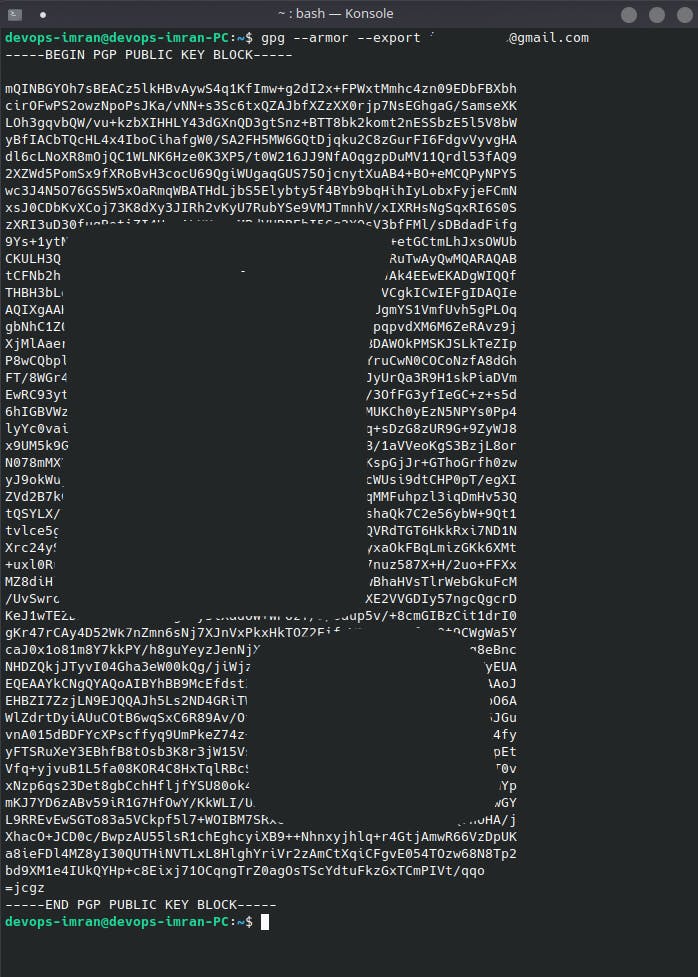
To allow others to verify your signed commits, share your GPG public key with them. You can export your public key using:
gpg --armor --export <YOUR_EMAIL>
Replace <YOUR_EMAIL> with the email address associated with your GPG key. Share the exported public key through key servers, email, or other secure channels.
Step 7: Add your GPG key to your Github account
To enable GitHub to recognize your signed commits and display a "Verified" badge next to them, you need to add your GPG key to your GitHub account.
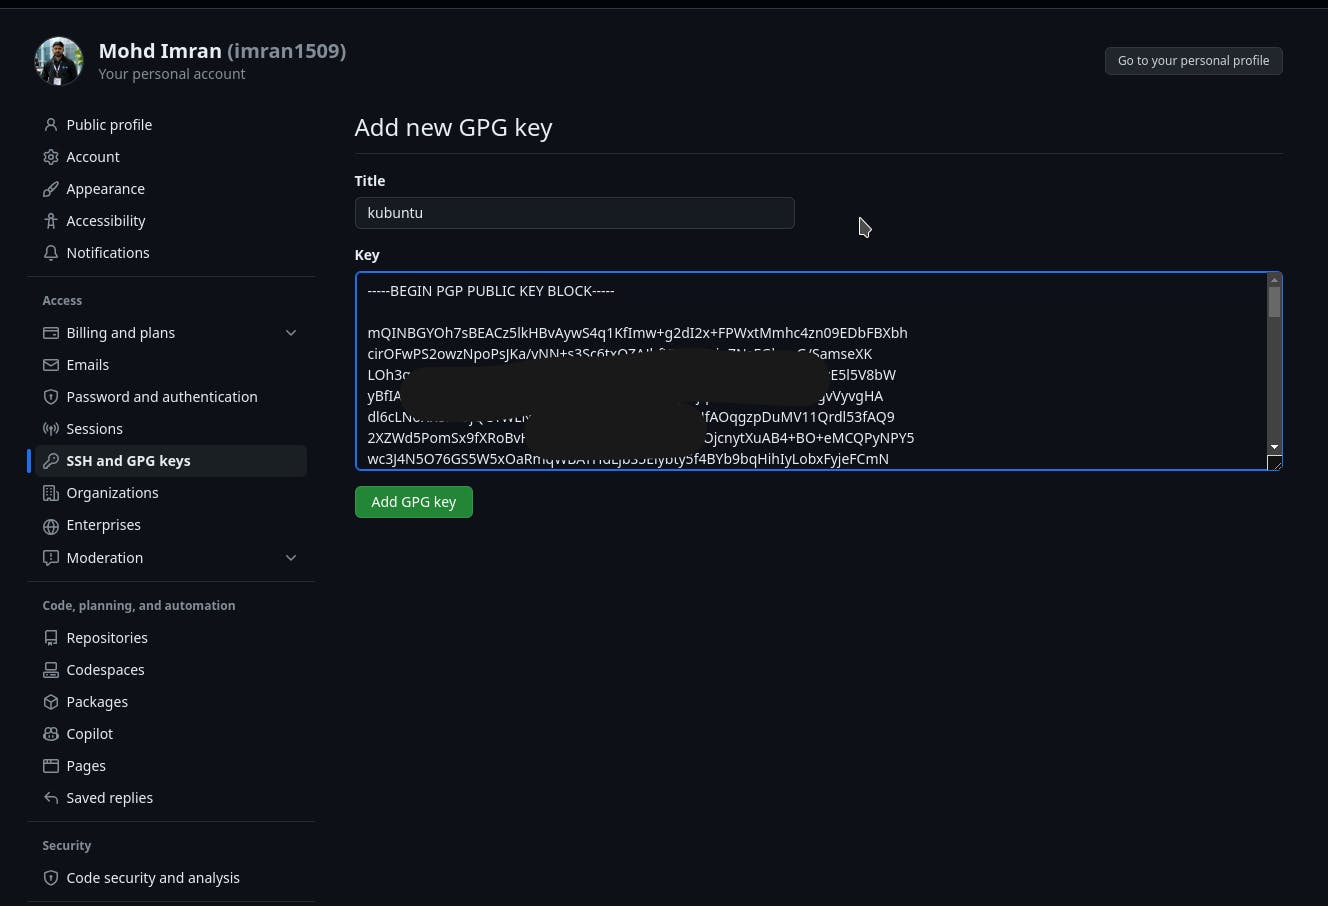
Copy Your GPG Key: Copy the output including -----BEGIN PGP PUBLIC KEY BLOCK----- and -----END PGP PUBLIC KEY BLOCK----- from the previous step
Go to your GitHub settings > SSH and GPG keys > New GPG key
Paste Your GPG Key: Paste your GPG public key into the Key field.
Click Add GPG key to save it to your GitHub account.
Now Your GPG key is added to you GitHub account.
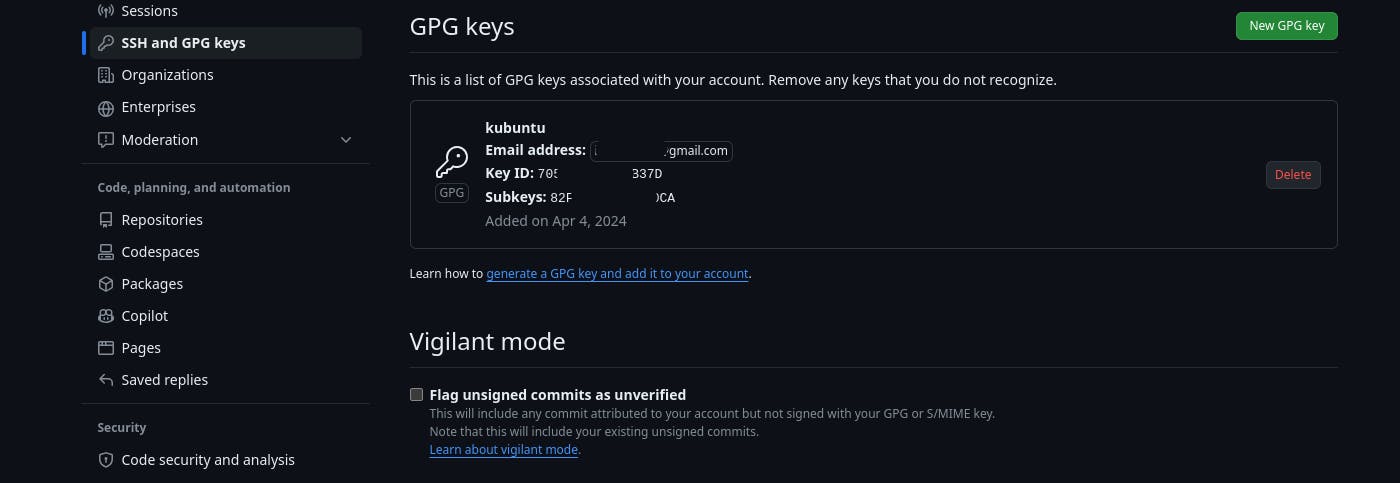
Once you've added your GPG key to your GitHub account, GitHub will recognize your signed commits and display a "Verified" badge next to them. This provides additional validation of your commits' authenticity to other contributors and users of the repository.
Conclusion
Signing your commits is a simple yet effective way to enhance the security and trustworthiness of your contributions to a Git repository. By following the steps outlined in this guide, you can start signing your commits today and contribute to a more secure and transparent development process. Whether you're working on open-source projects or proprietary software, commit signing helps ensure the integrity and authenticity of your code changes, fostering a culture of trust and collaboration within the developer community.